Let's dive into the core of what makes the Adobe Lightroom Enhance Details function so great, and how to get the best out of this new advanced feature.
At the core of everything we do with our images, whether it’s posting them to Instagram or creating huge fine art gallery prints, post-processing is key to achieving a signature look. And by far, the most important element of a well processed image begins by editing the raw files from our cameras. That’s why the addition of the new “Enhance Details” feature in Adobe Lightroom is such a big deal. For someone like me who wants to achieve the highest quality possible when I’m editing my images, knowing that this new “Demosaic” algorithm by Adobe is using machine learning to analyze and enhance the image at a pixel level gives me a tremendous amount of comfort, and it’s something that I’ll be using from now on for all of my portfolio work.
Now, I’ll start by saying that there is quite a bit of science behind this and Adobe officially states the following. “The new Enhance Details feature available in Camera Raw, Lightroom Classic, and Lightroom CC approaches demosaicing in a new way to better resolve fine details and fix issues like false colors and zippering. Enhance Details uses machine learning—an extensively trained convolutional neural network(CNN)—to provide state-of-the-art quality for the images that really matter. Enhance Details works well on both Bayer (Canon, Nikon, Sony, etc) and X-Trans (Fujifilm) raw mosaic filters.” To access the Enhance Details option inside of Adobe Lightroom, simply right click on any raw file and you'll see it in the menu.
TRANSLATION: It makes some of my pixels look better, hooray! #winning 😀
If you want the complete technical information about how Enhance Details functions, click here for the official Adobe release notes.
I’ve had this new version of Adobe Lightroom for quite a few days before the official release today, so I was able to give it a nice and thorough test on a range of different raw files from various cameras that use both Bayer and X-Trans Sensors. Here are a few things I noticed right away.
-
You’re not going to see any difference unless you zoom way into your image. Most often to a near pixel level.
-
Enhance details works TREMENDOUSLY well on Fujifilm X-Series Cameras that use X-Trans Sensors.
-
The most noticeable changes happen on low to medium megapixel resolutions. There are only subtle differences at Medium Format.
-
While this certainly works on landscape photography, it’s in cityscapes and architecture where you’ll really notice the largest difference.
-
I was surprised when it corrected issues that I would’ve never noticed on my own, even with high megapixel images.
-
In every single test, even if the Enhance Details results were extremely subtle, I never found any area where the pixels were harmed or details were reduced.
Example number one - A sunset shot of Dubai and the Burj Khalifa
Now that we’ve talked about what it does, it’s time to show some of the results. Let’s begin with a photo from Dubai that was shot using a Fujifilm X-T2. The X-T2 has a 24 megapixel X-Trans Sensor. This is single raw file with some basic shadow and highlight adjustments in Lightroom. All sharpening and noise reduction has been disabled.
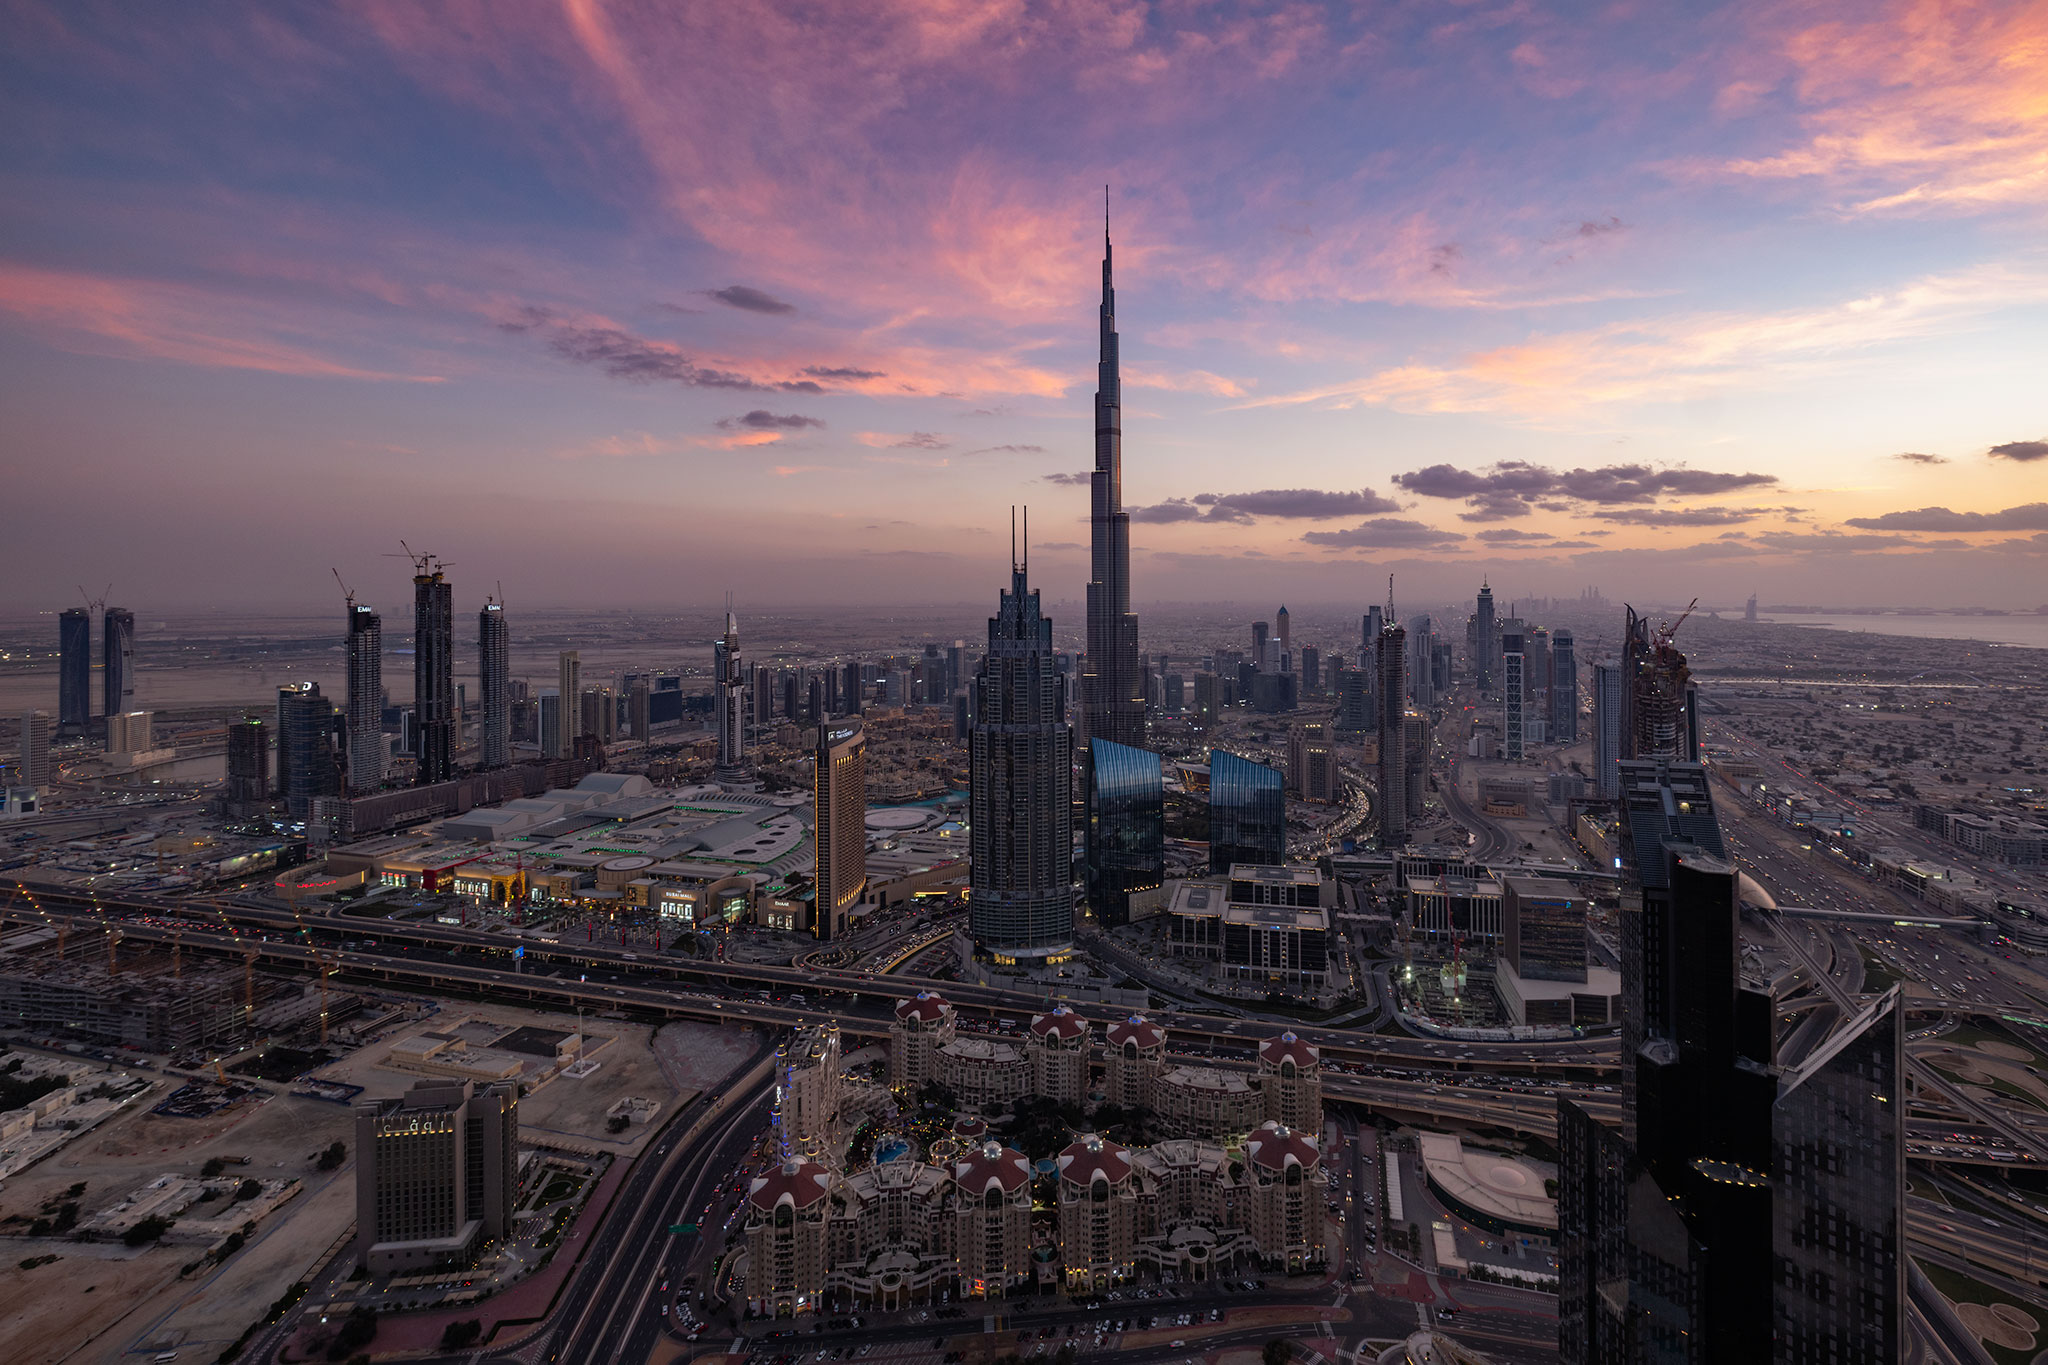
(Fujifilm X-T2 / ⅛ Seconds at f/8 / ISO 200)
Now let’s zoom into the center of the image surrounding The Address Hotel. In this before and after comparison, notice how, after the Enhance Details tool is applied, the clarity of the pixels around the hotel sign become way more defined. Similarly, the pixels in the far background buildings also become more clearly defined. What’s even more impressive, however, is that each individual light, whether it’s yellow, red, or white, becomes perfectly resolved and individually separated.
[twenty20 img1="10810" img2="10811" width="100%" offset="0"]
Going a bit further on the topic of lights and city lighting–let’s compare another before and after that focuses on the bottom portion of the image. Here, you’ll notice how it not only corrects the lights on the buildings, but it also corrects the headlights and tail lights on the cars (lower left). Bear in mind that this is only a 24 megapixel image so regaining that much extra clarity in the far background is impressive.
[twenty20 img1="10818" img2="10819" width="100%" offset="0"]
Example number two - A blue hour shot of Matera in Southern Italy
This image was shot using a Fujifilm X-Pro2. Once again, the X-Pro2 has a 24 megapixel X-Trans Sensor. This is a single raw file with some basic shadow and highlight adjustments in Lightroom. Just like the previous example, all sharpening and noise reduction has been disabled.
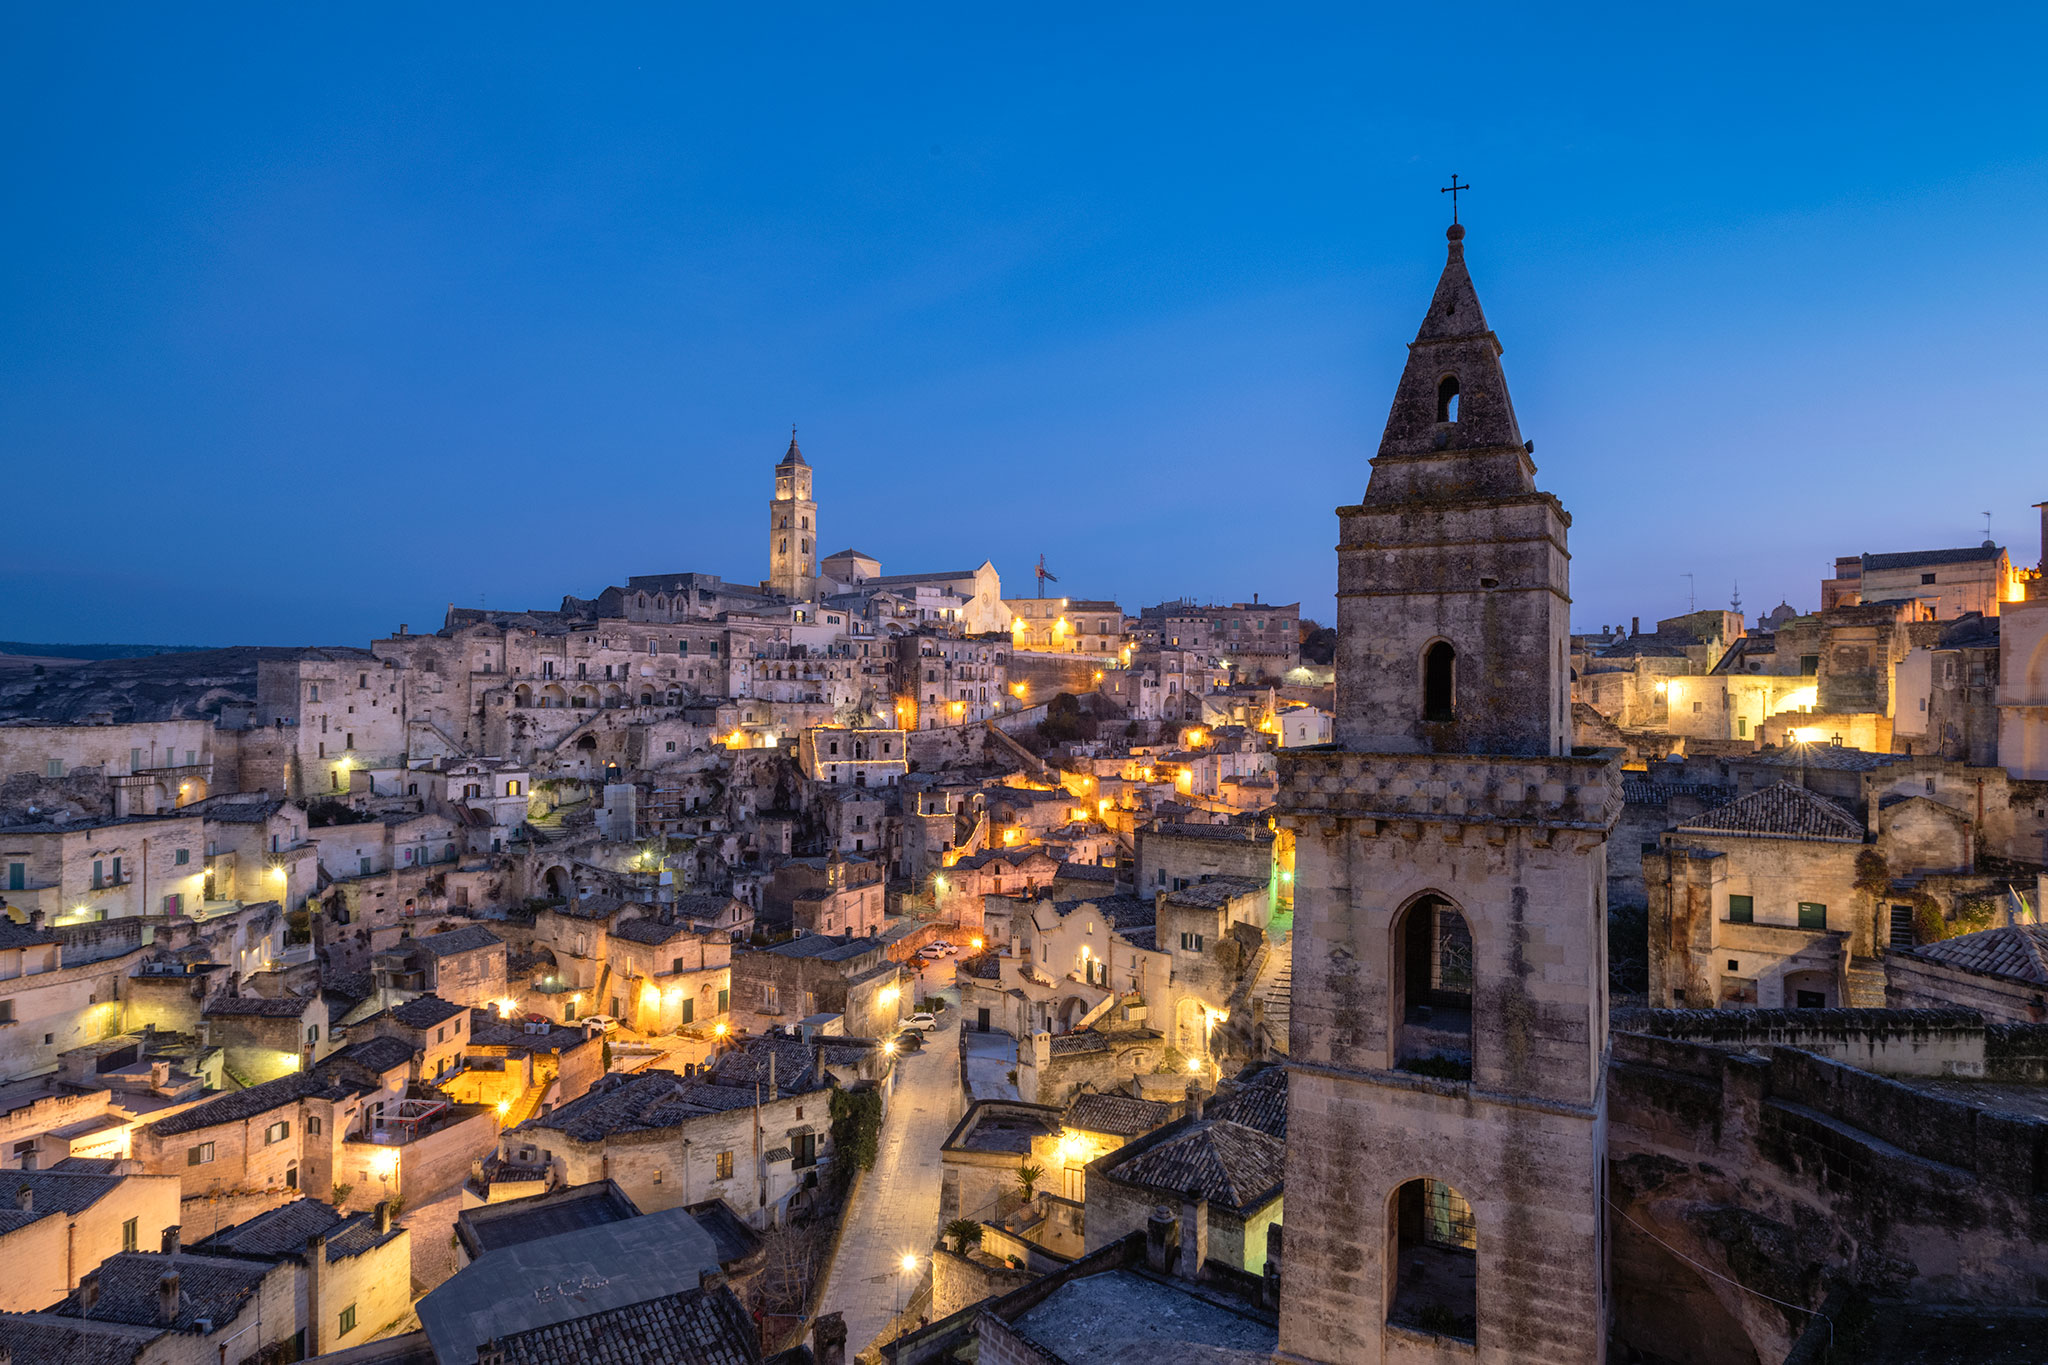
(Fujifilm X-Pro2 / 5 Seconds at f/8 / ISO 200)
Matera is one of the oldest cities in the world so let’s just call it a mess of random textures. That being said, with this density of rocks, bricks, stucco, and overall randomness, the effect of Enhance Details is going to be much more subtle. What to look for here is the extra clarity and definition around the rope lights and the increased sharpness of edges, bricks, and overall details (look at the dark bricks next to the building with the rope lights). In this case, Adobe Lightroom does a great job already by default. Using the Enhance Details function is just a small bump of extra quality.
[twenty20 img1="10822" img2="10823" width="100%" offset="0"]
Example number three - A sunset from Pietrapertosa - A town blended into a mountain
This is another Fujifilm X-T2 file edited the same way as the previous examples. This is just a good image to demonstrate what happens when architecture blends in with a landscape and how those details are affected.
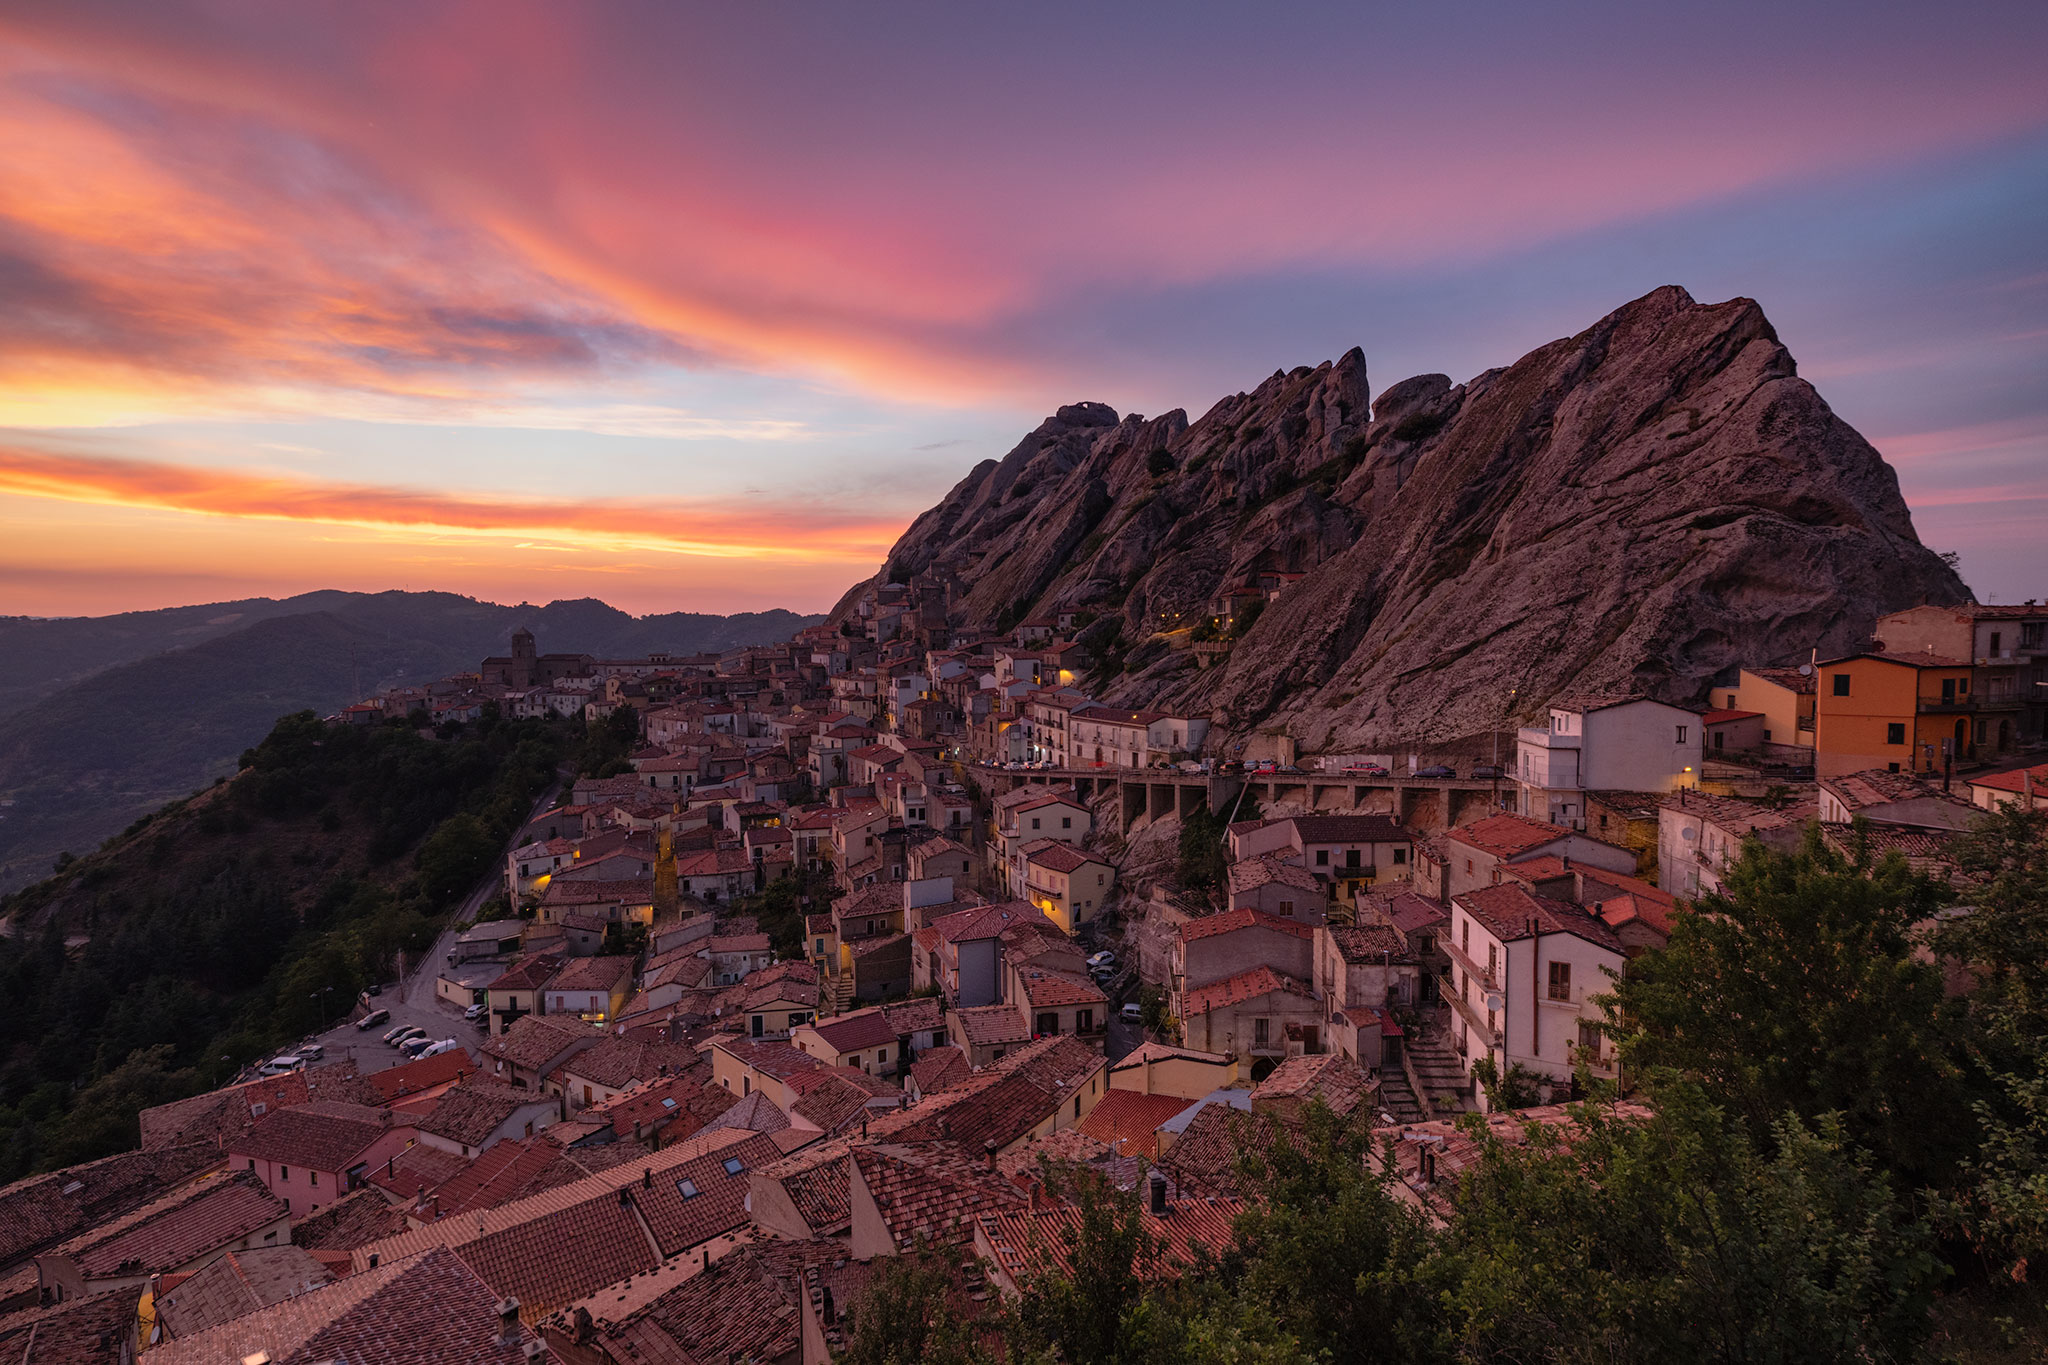
Diving into the details here, we can really see how Enhance Details not only sharpens edge pixels and resolves details, but it also separates color textures. This is extremely evident in both the house and the surrounding mountain. We’re quickly able to resolve richer color tones as well as more details of texture and geometry on the mountains. Pay close attention to the fencing in front of the house in the mountain as well as the darker textures imbedded in the rocks.
[twenty20 img1="10826" img2="10827" width="100%" offset="0"]
Example number four - Another sunset in Dubai. Captured at super high resolution.
So far, I’ve been focusing on Fujifilm X-Series which uses X-Trans Sensor Technology. Now it’s time to take a look at an ultra-high resolution image and how Enhance Details looks when applied. This is a single raw captured using the Fujifilm GFX 50s Medium Format Camera. This camera uses a large Bayer sensor, and aside from the size, it’s very similar to other Bayer Full Frame Sensors that you’ll find in Nikon, Sony, and Canon Cameras. While Bayer Sensors range in various megapixel resolutions, larger (Medium Format) sensors are able to resolve a higher pixel density in the far backgrounds. Again, cityscapes like Dubai work perfectly to illustrate this due to the massive amount of sprawling city and architecture. It's important to understand that Medium Format sensors are at the top of the pyramid when it comes to quality pixels, and Bayer Sensors are easy for software to render the raw files. I wanted to see if this new feature by Adobe Lightroom could improve on what's currently one of the best camera, sensor, and lens combinations available today.
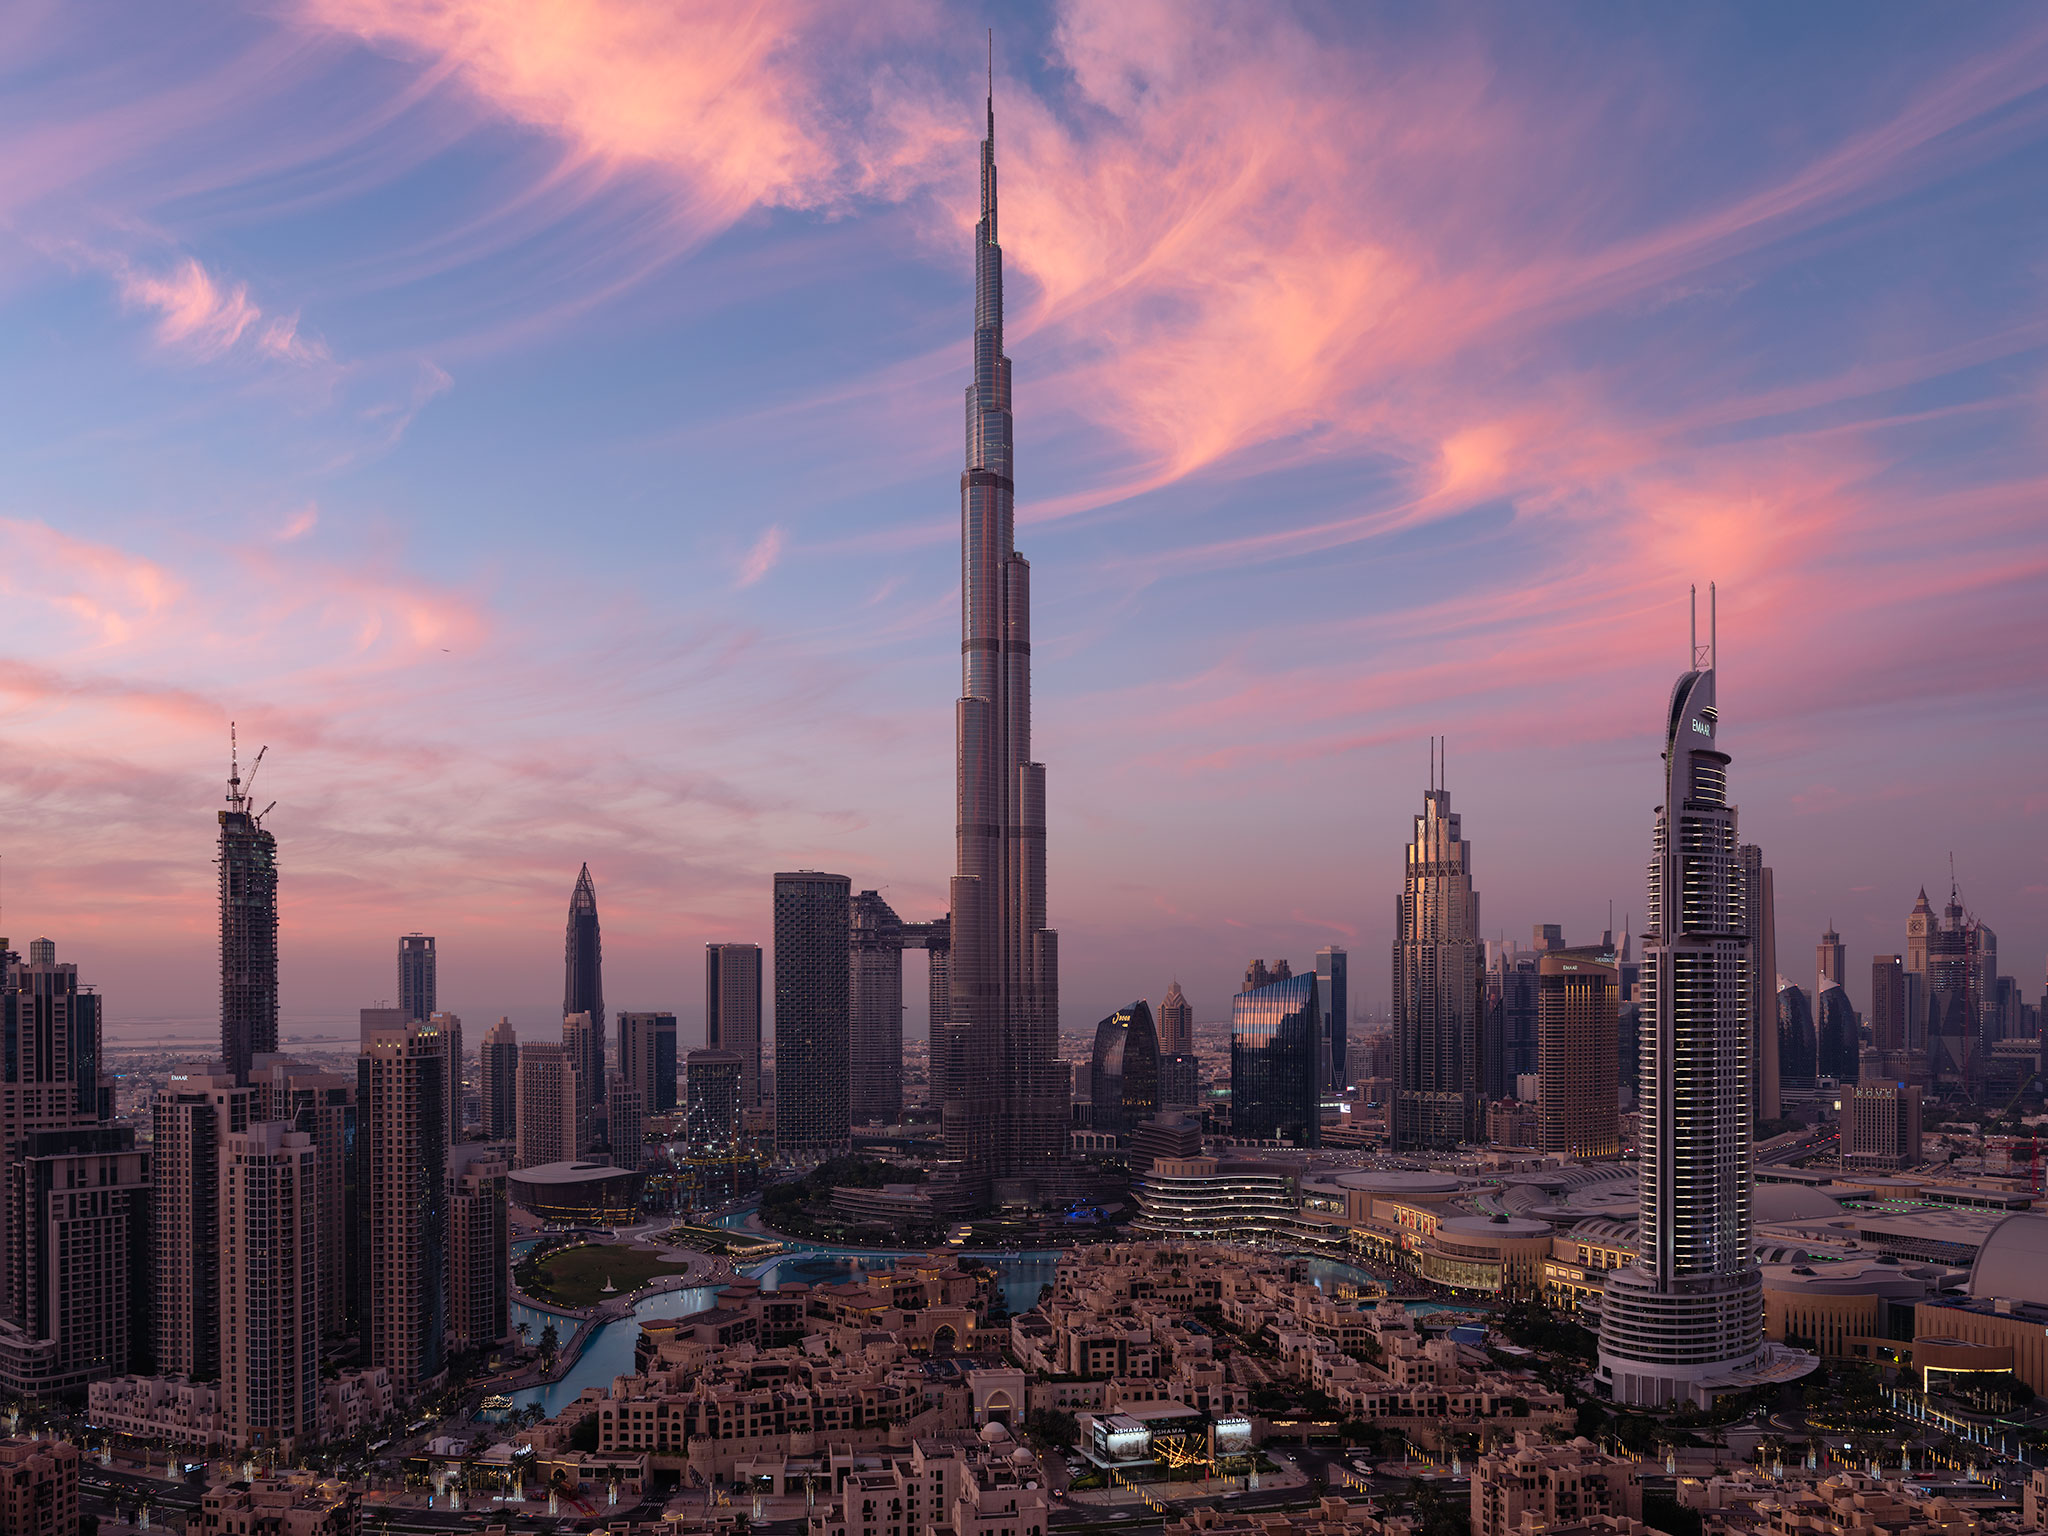
Now, let’s zoom ridiculously far into this image. The biggest changes to note here are to the Noon dot com logo on the main building. You'll see it just to the right, near the bottom of the Burj Khalifa. Next, on the tower to the right, we’ll see some increased (yet subtle) clarity around the windows and window frames. Additionally, some of the far lights in the background are better resolved into single pixels due to the correction of the antialiasing. But when we really break it down, it's easy to see that overall, the non-enhanced image is already super clear and sharp. So at this level, and at this particular sensor size and resolution, it’s not as beneficial as it is to the X-Trans Sensors. But it's definitely worth noting the extra clarity around the building lights and logos.
[twenty20 img1="10830" img2="10831" width="100%" offset="0"]
As we learned from the official Adobe Release Notes, the algorithm for Enhance Details and the Demosaic process is pretty stout, and we’ve seen better color and detail rendering on all of the previous examples, whether subtle or bold. What caught me by surprise in this GFX 50s image was that it also completely fixed the cyan and magenta fringing on the diagonal geometrical structure of the Emaar Tower. Not only that, it also was able to mitigate the magenta fringing without removing the magenta color cast from the sky. I'm not sure if that's due to what Adobe is calling an "extensively trained convolutional neural network," but regardless, I'm very impressed!
[twenty20 img1="10833" img2="10834" width="100%" offset="0"]
Understanding when and when not to use Enhance Details in Adobe Lightroom
-
First of all, let’s address the fact that currently the Enhance Details feature takes a bit of time to render (depending on the megapixel resolution of the raw file), so it’s obviously not something you’re going to apply to multiple terabytes of raw files. Even if you have the fastest computer on the market, I still wouldn’t recommend it. It would be overkill
-
First and foremost, make sure to apply the Enhance Details function while you’re still working on the raw file in Adobe Lightroom and before you export and edit the image in Photoshop. It's designed to take advantage of the totality of the raw data included in the file. It works with every native raw file currently supported by Adobe Camera Raw
-
When Enhance Details is applied, Lightroom creates an additional dng (raw) file so make sure to account for that extra hard drive space if you plan to apply it to many files.
-
Enhance Details is something you should apply to portfolio images, photos that are going to be scrutinized under heavy magnification, or simply the photos where details matter the most.
-
If your ultimate final output is to social media (Instagram, Flickr, Facebook, etc.) then there will be no discernible difference with or without Enhance Details applied. The only time I would recommend using it for Social Media posting is if the resulting image will be heavily cropped. Then those small details may show through.
-
Individual results will vary based on the subject of the photograph itself. Some experimentation will be required to know when and when not to use it based on your camera and subject matter. My advice is to really zoom in and hunt around to see if it's worth the extra rendering time.
-
Speaking to all the points above, applying Enhance Details is extremely non-destructive. While it generates a new dng file, I haven't found instances where it has damaged pixels or colors. Even if the results from your particular camera and lens setup are subtle, it could still be worth exploring if it yields some advantages.
My conclusion and closing comments
Anytime my image editing and post-processing tools become more powerful, I consider it an absolute win. I rely on Adobe Lightroom and Photoshop on a daily basis, and over the years I’ve seen many new features added as each product has evolved. This new way of enhancing details is by far my favorite addition in quite some time, and with this post, I wanted to quickly share the findings I’ve made so far and highlight the potential benefits.
I also want to address the fact that I’ve refrained from comparing these Adobe Lightroom results to other raw processing software packages. I feel this would be unfair since it’s an additional process that’s applied after the raw file is already imported into Adobe Lightroom. Because of that, it makes the “Enhanced Result” more than a baseline comparison of raw processing algorithms. It’s on a different level.
That all being said, I’m ABSOLUTELY sure that we’ll be seeing a bunch of other blogs and media sites digging into the super technical details in order to figure out which software package is the one to rule them all. So to save you all some time, the correct answer is 42. 😉
If you have any questions, feel free to comment below.
And, if you want to learn how I create the signature look in my photography:
I have created an extensive series of video tutorials called Photographing The World that teaches my entire shooting and image editing process both in-the-field and in post-processing. It covers every single aspect of my workflow from start to finish.
Live on-stage during Photokina 2018
It was early in 2009 when I picked up a camera and launched my career as a full-time travel photographer. Back then, if someone would’ve told me that over the next 10 years I’d be visiting more than 65 countries, flying almost 2 million miles, and giving hundreds of talks, workshops and live events on stages all over the world, it would’ve been impossible to imagine. Now, the idea of flying 200,000 miles a year has become a commonplace, and so has the practice of seamlessly living and working no matter where I happen to be in the world.
In this presentation, I begin by telling the story of how Naomi and decided to amplify full-time travel in 2012 by selling nearly all of our possessions and become 100% location independent. For 5 years, we lived out of our suitcases with an extremely aggressive travel and work schedule that flung us all over the globe. Little by little, the projects and clients got larger along with the demands of always having to change out gear. In 2017, our lifestyle evolved, and once again we established a home base of operations in Florida. Though still on the road 10-11 months of the year, after effectively being homeless for 5 years, having somewhere to call home again is a profound comfort.
On this journey of a million miles, not only has my lifestyle changed, but my photography has constantly transformed as well. I began by focusing on specific times of day like Sunrises, Sunsets, Blue Hours, and of course the night for Astrophotography in the form of both star trails and shots of the milky way. As my technique evolved, I began to experiment with blending different moment in time together to create the perfect harmony of both natural and artificial light. Sometimes combining exposures that are hours apart, I explain the details and philosophy of this photographic blending technique. We examine multiple before and after comparisons that focus on how the post-processing is seamlessly accomplished.
A Journey of a Million Miles. Live on-stage during Photokina 2018
Getting the most out of raw file post-processing using Adobe Lightroom.
In addition to the main stage, I also taught a 40 minute mini-workshop that dives into how I get the most out of my raw file post-processing using Adobe Lightroom. If you’re curious about how I achieve the unique style in my photography, this workshops sheds light on the early stages of the process.